Git has become the de facto standard for web development source control. However, there are times when you don’t need all its features and complexity. If you’re developing alone on a single machine, and want a repository mainly for backup and comparison, consider a simpler application like Fossil. It’s an easy installation: you drop a single executable file anywhere in your system path. There are downloadable ready-to-run binaries available for Linux, Mac, Windows, and BSD, or you can compile it yourself.
Different From Git #
Fossil has commands analogous to Git, and allows multiple projects. It’s different in that all the versions (“artifacts”) for each project are stored in a single local file. That makes it a nice streamlined complement to Git. I use Fossil to frequently save my work, so that I don’t have to worry about losing it or reverting my changes. Then I periodically commit the code to Git after testing.
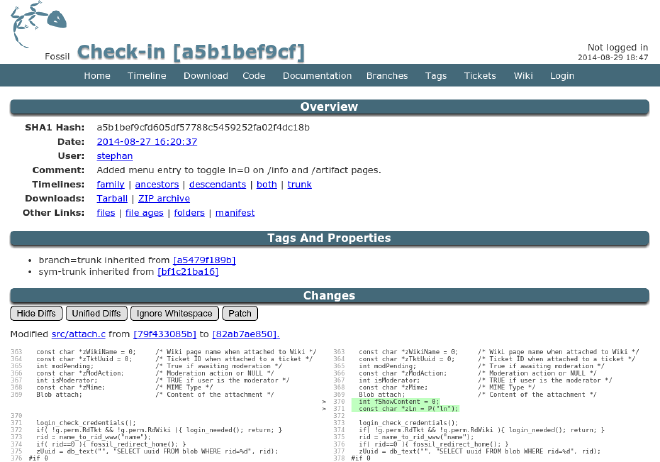
Fossil also has some features that the core Git commands lack. The most obvious is a local web server that lets you see your history and diffs through any web browser. The web UI also provides a built-in wiki – the online documentation is an example. There’s even an issue tracker, although it’s primitive.
A small departmental team might also find Fossil handy – assuming they don’t have access to their company’s normal repositories, or lack authorization or budget to host one externally. All that’s needed is for one computer visible on the LAN to run the web server.
Setup #
Fossil is a mature project. I’ve experienced no errors or corrupt files, although I’ve had to respawn the web server occasionally when running under Windows. I started by creating a folder “fossil” within My Documents. This is where my database files will be stored. I intentionally kept it separate from my source code, on a different path.
I then dropped into the Windows terminal (cmd.exe) and changed (cd) to the root directory where I’ll create my first project:
fossil init c:/users/paul.saletan/documents/fossil/myproject
Next, I launched the web server:
fossil ui myproject
I could then configure my project by browsing to…
http://localhost:8088/setup_config
…and entering a project name and description in the Admin | Configuration setion. Windows users whose clock is set to local time will want to also go into Admin | Timeline and
uncheck the box labeled "Use Universal Coordinated Time (UTC)".
Configuration done, I jumped back to the terminal and added some source files to the project…
fossil add my_first_file.xml
fossil add my_second_file.xml
…and committed the latest changes to the repository:
fossil commit
These last two commands (add/commit) are all you need to maintain regular versioning of your work. You can use your web browser to review the results. Fossil shows your versions side by side with the usual color coding to identify diffs.