Virtualization platforms have drawbacks for light home use, although they’re often free for single server installation. They may only be supported on specific hardware ( VmWare ESXi, their configuration isn’t simple ( Xen, or they chew up a significant amount of CPU even when they’re idle ( VirtualBox. Often, they force you to pre-allocate all the RAM you might need when you start each virtual machine (VM). If you’re running several VM’s, you may run out of memory, or performance drags.
Wouldn’t it be great if you could allocate memory only as the application needs it – the way your OS manages conventional applications and services? And minimize their impact on CPU for applications that don’t need a a GUI? For many server applications involving Apache and MySQL, you simply need the ability to run a few services in their own isolated environment. BSD has this capability using “jails”. In the Linux world, similar virtualization is provided by hosting services offering Virtual Private Servers (VPS). For as little as ten bucks a month, you can rent your own space on their server. Unlike typical shared hosting, your virtualized environment is an almost complete Linux OS. You have root access to install most anything you want.
Many VPS hosts run OpenVZ, the open source basis of the Parallels Virtuozzo commercial product. OpenVZ uses a specially compiled Linux kernel. All the virtualized environments – called “containers” – run under the same kernel. By sharing the same kernel and underlying OS services, the drain of each VM on the system is minimized. Proxmox Virtual Environment (Proxmox VE) is a bare metal installer that can get you up and running with OpenVZ. Proxmox VE puts a Debian customized OpenVZ system on your drive and a nice web console to manage it. All you need is a dedicated box with a 64-bit CPU. In addition to VM’s running under a common Linux kernel with OpenVZ, Proxmox can also spawn fully virtualized KVM machines running Windows or Linux.
To install, download and burn the ISO image to a CD. Proxmox will partition the entire disk using the Logical Volume Manager (LVM2), separating the root operating system from the space reserved for your VM’s. Then log in with your web browser to create your first guest.
Each OpenVZ VM uses a template to unpack its initial files for each appliance you create. The template is stored in a standard targz format. Proxmox VE comes with pre-created templates for several basic distros (Debian, Ubuntu, CentOS, Fedora). The web based administrator console can download these appliances for you. Some templates have server applications added to the base install, like Drupal, Wordpress, and Joomla. The selection for these customized appliances is pretty limited; you’re probably better off just installing a base template or rolling your own. You can also download templates from the OpenVZ project.
Once you have the template you want, you create your VM from the web console, assigning it a numeric ID, memory and disk space, network type (Virtual or Bridged), IP address and DNS domain and servers. I like to assign an IP address on my subnet that is the same as the ID, for example VM number 101 has IP address 192.168.0.101. Then click the Create button and Proxmox does the rest. If you prefer, you can use SSH and the command-line equivalent (vzcreate) to install the VM. Proxmox creates virtual ethernet connections and I can access each VM by its IP on the LAN.
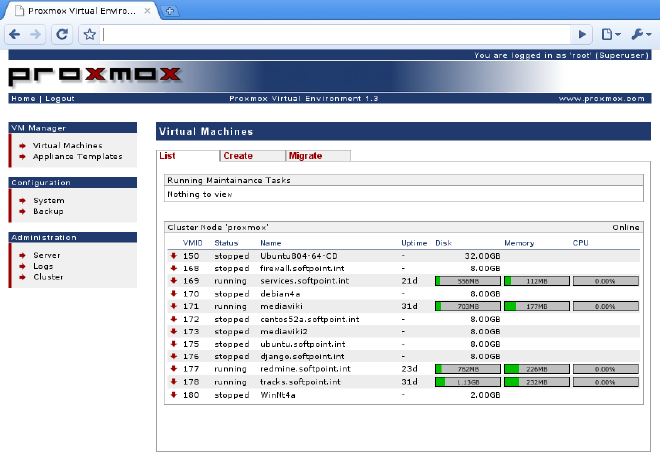
Managing a Proxmox VE is trivial. You click buttons to start VM’s, and you can designate which ones should start up automatically when the system boots. I run 3 or 4 round the clock. Because of Proxmox VE’s common kernel approach and the fact that they’re all just web and database servers, they rarely consume more than a few percent of CPU, the fan stays quiet, and the box stays cool. A scheduled backup UI is also provided. If I need to add software or change the configuration on any of them, I’ll SSH to that VM and run apt-get or whatever command that distro uses to install its packages.
Limits on VM’s in OpenVZ work a lot like restrictions for a multi-user system. You can set CPU limits and quotas on disk space – for the entire VM, as well as per user or group – at any time after install. OpenVZ uses beancounters to set maximums and minimums on RAM. I don’t pretend to understand much of it. The takeaway is that no single VM is guaranteed all the memory you allocate to it. Depending on claims from other VM’s, the system may have to diminish its RAM or even kill VM’s to keep performance acceptable. I’ve never run into this situation. Clearly, you should consider it before overloading your server with simultaneous memory-hogging VM’s.
I haven’t experimented much with the KVM side of Proxmox, because I don’t have much need to run Windows virtualized. KVM support is built into recent kernels It’s reputed to be rapidly improving but is nowhere near the maturity of VmWare. I recommend that you read the Proxmox forums and judge for yourself. Some users say it’s working well for running Windows Server. If you run a graphical VM, you’ll appreciate that Proxmox lets you launch a window into it directly from the web admin tool, using Java to create a VNC-connected terminal.
Proxmox VE has proven to be stable for the stuff I want to run every day, and a wonderful way to try out new applications. I just create a new VM for the app with its own IP address, and install it alone with whatever supporting stack I need (Apache, MySQL, PHP/Python/Ruby etc.). If it’s a keeper, I may add it to another VM that already has these servers. Otherwise, I destroy it without having to undo anything else.
In the next article in this series, I’ll look at an easy way to add server stacks and applications to your desktop, server, or virtualized machines.