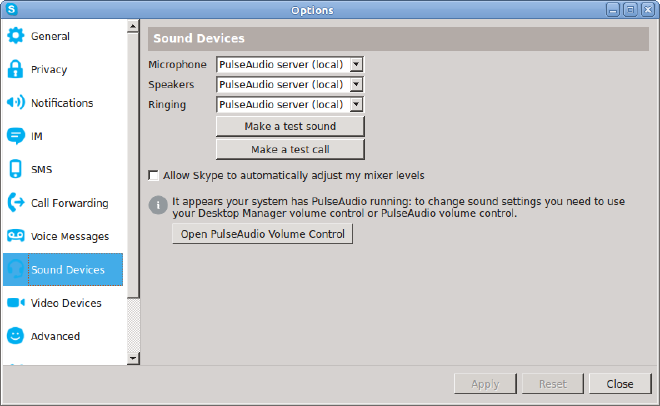
If you’ve installed Skype for Linux but your audio isn’t working, the problem may be that PulseAudio isn’t configured correctly. This can be an issue when using multiple audio sources, e.g. plugging in an external USB device like a webcam or headset. An obvious symptiom is when you click the the Skype “Make a test sound” button and hear sound on your speakers, but not through the device.
Installation #
Now that Skype has stopped supporting the ALSA sound system, the best way to get sound working is to use the Pulse Audio volume control (pavucontrol). Although different from the basic mixer (“Volume Control”) GUI, it’s a lot less confusing once you get used to it. If your Ubuntu/Debian system doesn’t have it, you can install it with:
sudo apt-get install pavucontrol
Troubleshooting preliminaries #
When you launch pavucontrol, it offers you five tabs: Playback, Recording, Output Device, Input Device, Configuration. The trick to getting Skype to use the right device is to enable it in the Playback and Recording tabs while you are playing a test sound or making a test call from Skype. Otherwise, the device won’t be visible in these tabs, although you’ll see it in the others.
Before making a test call, go through these tabs and confirm that your device is recognized. If PulseAudio fails to show it, anything you configure in the Skype application itself will likely fail. First, click on the Playback tab. Then open your Skype application side-by-side with it, click on the Options menu and go to the Sound Devices tab.
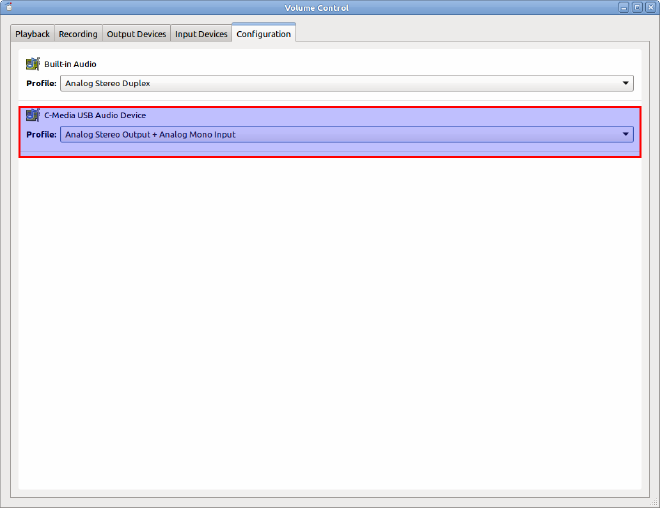
First, look for the device in the pavucontrol Configuration tab, it should appear as shown above. My USB headset is the one labeled “C-Media USB Audio Device”. If it doesn’t show up, you’ve got a problem more basic than this blog post – or the Skype application – can solve. Also, if you’re going to use it for listening as well as a microphone, its Profile should be set to “Analog Stereo Output + Analog Mono Input”.
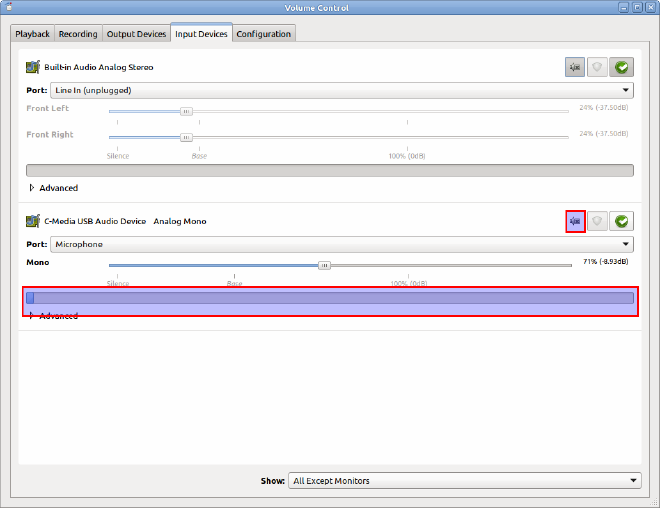
Second, click on the Input Devices tab. The same device you saw in Configuration should appear again. The Port should say “Microphone”. Ensure that the device is not muted. The background square around the icon should not be grey. (The status is confusing to read because the icon shows an “x” next to it regardless.) Now test your microphone by speaking into it. It should move the meter.
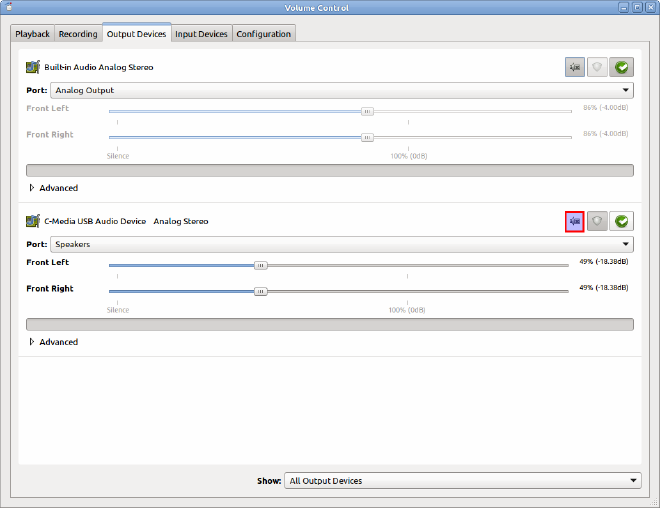
Similarly, go to the Output Devices tab. Unmute your device. Mute the “Built in Audio Analog Stereo” device unless you want both sets of speakers playing at once.
Making the test call #
Now jump over to the Skype application and click the “Make a test call” button (from the Options menu, Sound Devices tab). While the call is made, Watch the pavucontrol Playback screen in the pavucontrol window and you’ll see the Skype application pop up. Click on the button that identifies the Skype output device and change it to the one you plugged in. You should start hearing audio immediately.
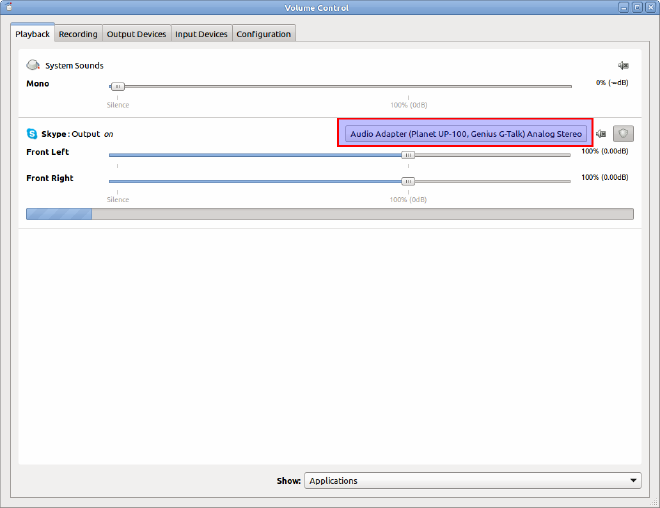
Click on the pavucontrol Recording screen and do the same thing: switch the Skype input from the default device to the USB one.
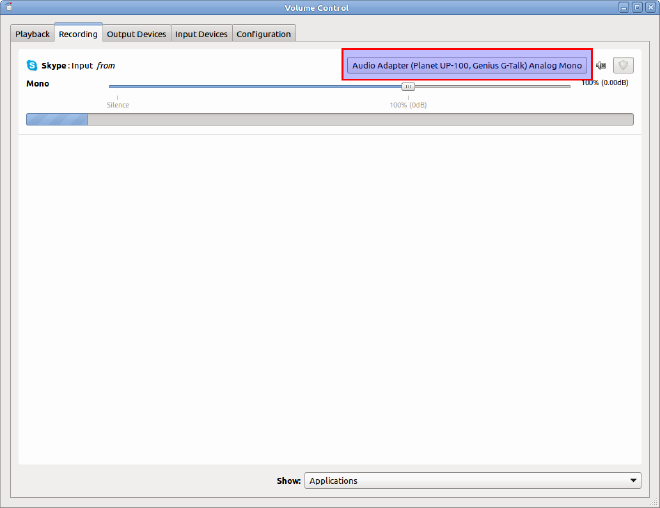
You’re all set to make real calls on Skype now. I can’t promise it won’t happen again. Skype on Linux is finicky compared with Windows. It seems I run into this issue every few weeks. At least now I know how to fix it temporarily.