I’ve gone through hardware routers at the rate of about one a year, primarily cheap brands like D-Link and Airlink. They were inexpensive in dollars yet costly in terms of the time I spent wrestling with their limitations. They rarely locked up but were often a bottleneck. Streaming a TV show or sports event from the internet made my cable internet feel like dial-up. I kept buying newer models, hoping to find a satisfactory one.
Then I discovered software called Ipcop that can turn most any old computer into a gateway, firewall and DHCP/DNS server. All I needed to add was a second network card. The speeds climbed to what I expected. However, it made me hungry for more data from and control over this quasi appliance. For example, I still couldn’t view the traffic and throughput in real time; nor could I adjust how much bandwidth was going to different applications.
Installation and Setup #
I decided to try pfSense, a FreeBSD-based distribution that claims to do all this and more. Although BSD lacks some of Linux’s support for the latest video and USB devices, that doesn’t matter when you’re building a machine dedicated to networking. And because the release 1.2.3 ISO image is a live CD, you can verify that your network adapters are recognized before you commit to installing it. The pfSense site has a set of screenshots showing the steps. The sequence may seem intimidating to a beginner. However, there’s only a couple of decisions that require thought.

First, pfSense boots to a spartan black and white console with a numbered menu. Choose menu option 1 to assign your WAN and LAN interfaces. Your WAN interface is the one you’ll connect to your modem and the public internet. The LAN interface is the one you’ll attach to your computer or, if you’re serving multiple computers, to a network switch or access point. Thus, the average user needs two network cards (or a network card in addition to your motherboard’s built-in LAN port), and pfSense won’t work without both of them available. pfSense will report the device names that it detects. In my case, I chose rl0 (a Realtek RTL8139 network adapter card) as the WAN interface, and lx0 (a built-in Intel network chip on the motherboard) as the LAN interface.
Only one more thing to do: select menu option 2 and define the LAN IP address. You can now ping other IP addresses on the internet and your private network to verify connectivity.
Next, I installed pfSense to the hard disk (menu option 99). pfSense only needs a few gigabytes space, so even a small hard disk will do. I chose the Quick/Easy install method, which automatically wipes, formats and partitions the drive. BSD systems don’t use the MS-DOS kluge known as an extended partition. pfSense has you choose one primary partition for the entire OS, which is then subdivided into “slices” for the filesystem and swap. You don’t have to worry about these details; the Quick/Easy install option takes care of them all, including the installation of a boot loader (bootblock).
A few minutes later, I was booting into my new system with the same black and white menu. I repeated the steps I had done during LiveCD testing to verify my settings. At this point, I could login from a web browser on another computer by using the IP address I had assigned (http://192.168.0.1). pfSense prompted me to run the Setup Wizard. There were about a half dozen text entry boxes to fill out, including my domain name, DNS addresses, timezone, and new admin password.
Performance and Features #
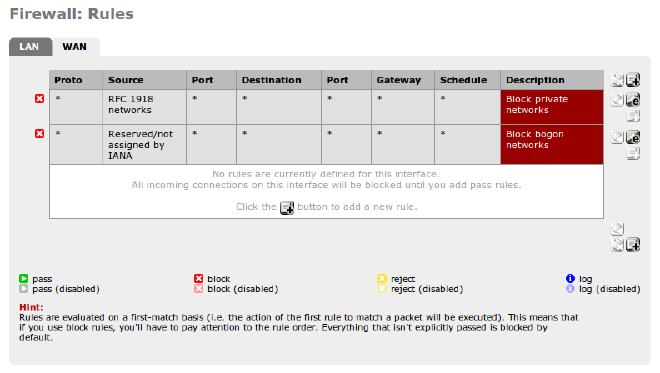
That’s all it takes to get pfSense up and running. I didn’t have to define a single firewall rule. pfSense defaults to allowing all outbound connections initiated from your LAN and denying all inbound connections coming from the WAN. Users that want to open ports to the internet or deny certain types of activities can add their own rules. Typical home users won’t need any.

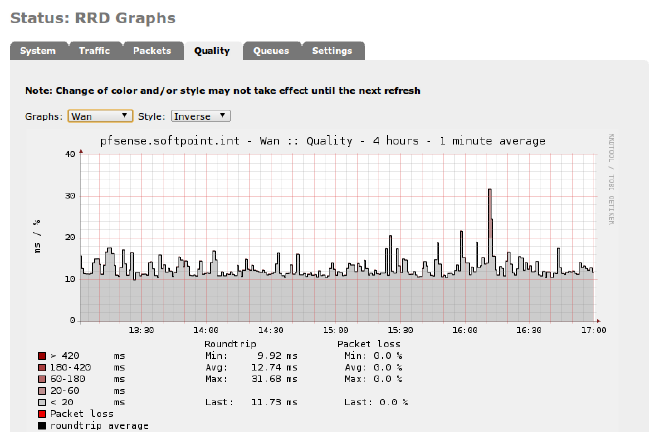
I’ve only been using pfSense for a few days, but it’s been absolutely stable and shows no risk of being overwhelmed. Its graphs display load and traffic history every which way, over hours, days, even months. On a Dell GX110 Pentium III (667 mhz) with only 256mb RAM, the CPU is rarely more than 5% busy, and RAM usage has never exceeded 25%.
One of the main advantages of pfSense over Ipcop is its ability to shape traffic precisely. My home phone service is from Vonage, and the voice quality can suffer when other traffic hogs the bandwidth. Many consumer routers offer a Quality of Service (QoS) feature, yet the user has little control over how it works. pfSense has an EZ Shaper wizard that addresses my VOIP problems. By answering the Wizard questions, it sets up traffic rules that divide up traffic into queues. While I did have to supply my download and upload speeds in Kbps Speedtest, the wizard managed the queue setup for me. For example, it asked me do I want to prioritize VOIP over other applications. If yes, it gives that queue a High priority. Moreover, pfSense let me specify how much bandwidth to guaranty for VOIP. I can also lower or raise priority for specific applications and services over standard ports. For peer-to-peer applications like bittorrent, I don’t have to specify them individually. pfSense lets me toss them into a “p2pCatchAll” queue with Low priority.
pfSense provides the DNS and DHCP services you would expect from a router appliance. The DHCP server can convert dynamic leases to fixed ones. If you boot thin clients from the network, you’ll appreciate the option to specify the server’s IP address and filename.
The DNS server was more flexible than the hardware router I used previously. I needed it to forward queries to a local DNS on my private subnet as well to the DNS upstream on the public internet. pfSense handled the requests transparently. All clients automatically used the pfSense IP as their sole DNS and received answers from it, regardless of where the requests were forwarded.
I’ve only scratched the surface of the feature set. In time, I’ll explore the rest. Besides scheduling and syslogging, pfSense advertises an NTP daemon, Ipsec, OpenVPN, load balancing, and UPNP. You can enable or install packages for Snort intrustion detection, the Squid web proxy, HAVP/Clam anti-virus, and FreeSwitch telephony. Administrators can backup and restore the configruation from XML files, and install bug fixes and upgrades directly from the internet.
A Clear Difference #
I’m very impressed with pfSense so far. I had expected a product thick with features but difficult to configure. Getting a working setup was almost trivial, thanks to the wizards. I don’t have benchmarks, but subjectively the speed is faster and more consistent than when I used a hardware router. I also got a significant speed boost when I used Ipcop. The differentiating advantage of pfSense over Ipcop is that my Vonage phone calls are clearer. I could always hear the other party fine. Now, for the first time, the upload speed (from LAN to WAN) is reliable enough that my outbound voice doesn’t periodically break up or get delayed.
Does pfSense make sense for you? It can’t do everything that a Unified Threat Management (UTM) application can do, but what it does it delivers exceedingly well. Google around and you’ll find people who swear that it can scale to support more demanding businesses. Commercial support is available, should you need it. Given how cheaply and quickly you can deploy a pfSense box, what have you got to lose?